This DIY artwork is so easy and inexpensive. I first got the idea for this DIY brush stroke artwork when thumbing through a HGTV Magazine. I saw the image below and knew I could create my own brush stroke art for my dining room.
What drew me to this art was the colors. Amongst everything else in this room, which I am sorry I don’t have a full image of the room, these simple pieces of artwork grabbed my attention. I just love the combination of colors and simplicity of composition.
Read: Cermin Beach, An Exotic Beach Rich in Charm in Serdang Bedagai
Brush Stroke Artwork is AWESOME!
What is awesome about brush stroke artwork is:
- It’s a quick way to add color to a space. Which is great for renters who can’t paint the walls.
- It looks expensive.
- It is inexpensive to make your own.
- When paired together with 2 or more canvases you create a sophisticated gallery or collection look.
- It takes almost no time to create…well not no time more like 20 minutes, but still it is fast and fabulous when finished.
How to Make Your Own DIY Brush Stroke Artwork
Materials & Supplies:
- 1-1/2″ – 2″ Paint Brush – 1 brush for each paint color.
- A white canvas – size depends on how big you want your DIY brushstroke art to be. I reused two 16×20 canvases I had already.
- Paint – I reused wall paint that I had, but you could use acrylic paints, my favorite brand is Craft Smart Acrylic Paints, available on Amazon or Michaels.
Keys to Painting Your Canvas
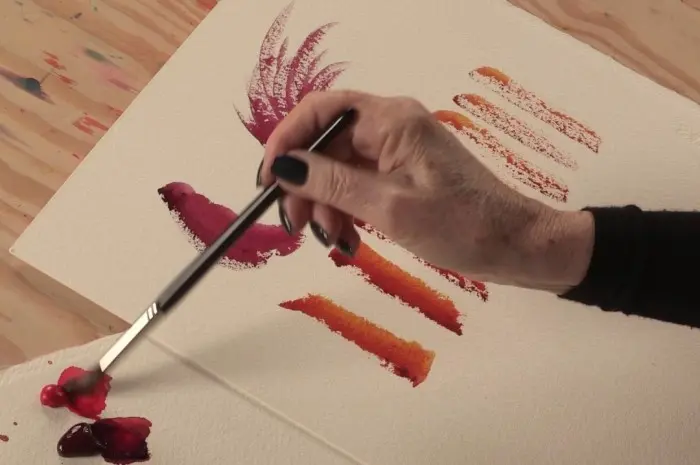
- Don’t put too much paint on the brush
The dryer your brush is the more brush stroke like the canvas will appear. Just dip the first 1/2 inch of the brush into the paint.
- When creating your brush stroke artwork I recommend randomly ordering the colors
This creates a more interesting finished work of art.
- Start by painting from the center then move out to the sides
As you get closer to the side flick your brush to create brush marks. Watch the video below to see how I painted the canvas.
- Leave about 1-2 inches unpainted around the edges
This creates a nice border for the artwork. Plus, white negative space contrasts with the colors.
Similar Post: Pandan Beach, A Beautiful White Sand Beach in Central Tapanuli
The FinalKey…HAVEFUN!
Lastly the final key is to have fun. Reminder that decorating your home should be fun. Though there maybe times when it seems hard. Overall you should have fun decorating your home. Especially when creating a meaningful home DIY style.
I hung my brush stroke canvases in our dining room. I think the results came out great. Now it is your turn to have fun and create your own DIY brush stroke art work.
